Overview
I'm going to be doing a lot of recording in my small bedroom project studio in the near future, drums in particular. The room is about 12' x 14' with a 8' ceiling and is on the second floor of a Dutch colonial house over the living room, which means there is almost no structural support for the floor. The house is on a busy corner and a bus or truck coming down the hill at just the right angle can shake the whole house. Even the sound from bad, missing or stupid mufflers can be felt in your feet.
Since I was thinking of putting down a sheet of plywood anyway to possibly liven up the close mic'd sound of the drums I decided to try to make a small floated stage to hopefully reduce incoming vibrations and to also reduce my out going vibrations for the sake of those in the living room below.
The design is pretty basic but uses Auralex U-Boats and some design suggestions from their Acoustics 101 document by Eric T Smith.
Since I don't have any space for construction projects at the moment I didn't want to make it too complex. If I could just bring home the pieces and put it together without sawing anything I'd be happy. So I ordered my U-Boats ( many thanks to Eric Radey at Full Compass for the speedy shipment, especially the week before Christmas! ), made my plans and went to Home Depot where the friendly guy in the lumber department helped me pick out the wood and did all the cuts for me. I also decided to make it only 6'x4' to reduce the complexity and number of cuts.
Hopefully others will find my project interesting, if not useful, and I'm open to any comments or design suggestions.
Best of luck!
Materials
| Quantity | Description |
| 4* |
12' long Hemlock 2x6's ( you could substitute 2x4's instead ) Have one cut into to equal 6' lengths and the other three into 3'9" lengths. *( you could actually use only three 12' lengths and just space the supports a little farther apart but the extra wood came in handy for me. See instruction step 8 below. ) |
| 1 |
8'x4' sheet of 3/4" MDF ( Medium Density Fiberboard ) Cut it into a 6'x4' piece. Make sure you check both length AND width since MDF dimensions are a little larger than standard plywood dimensions. |
| 1 |
8'x4' sheet of 1/4" R-Gard foam insulation ( or sheet of 5/8" drywall, see text in instructions step 4) The foam or drywall is easy to cut with a razor knife at your studio. |
| 1 | 8'x4' sheet of 3/4" plywood ( I used oak but less expensive wood will also work ) Cut it into a 6'x4' piece. |
| 1 | Box of 3½" #12 cross point wood screws ( you'll need about 50 or so ) |
| 1 | Box of 1½" #12 cross point wood screws ( you'll need about 30 or so ) |
| 1 | Box of Auralex U-Boats They come 50 to a box and I used just under half of them. |
| misc. | adhesive for U-Boats and foam, small pieces of wood and / or closet pole cups for drum stand 'stops'. |
Tools
| Tool | Description Of Use |
| electric drill | for drilling pilot holes and attaching screws ( a torque limiter is helpful ) |
| counter sink drill bit combo |
for drilling pilot holes and countersinking screw head in one step |
| cross point screw bit |
for attaching screws ( a hand screw driver will work if you don't mind your fore arms looking like Popeye's by the time you are done! ;-) |
| metal straight edge | for drawing lines ( a four foot long one works great ) |
| tape measure | for measuring ( measure twice . . . drill once! ) |
| square | for checking angles |
| random orbit sander | for sanding exposed edges round ( hand sanding will also work ) |
| pencil with eraser | for marking and unmarking screw points |
Instructions
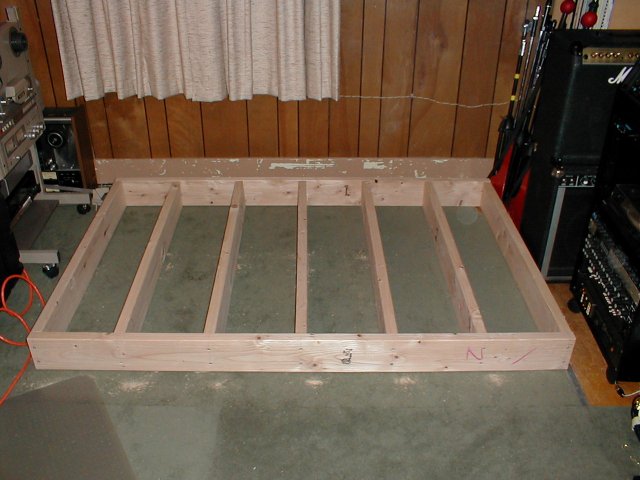
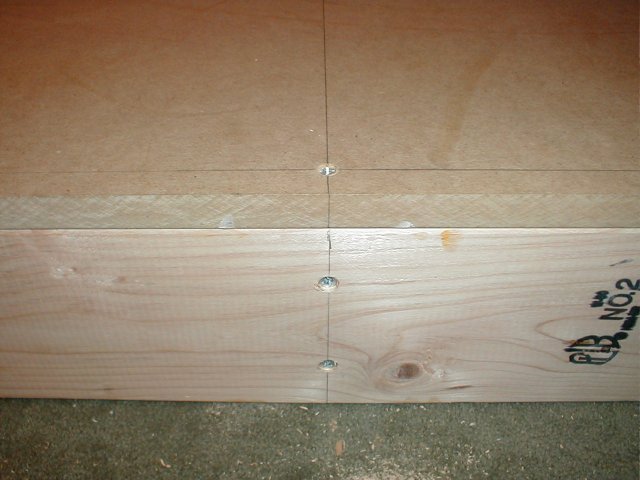
| 1 | Lay out the two 6' 2x6's and seven of the 3'9" 2x6's as shown. Drill pilot holes into the two front and back 6' 2x6's so you can attach the seven 3'9" 2x6's to them. From both the outside edges to the center drill holes at 3/4", 1', 2' and the center piece is at 3'. I put two 3½" #12 screws at each point, 1½" from the top and 1½" from the bottom.( see second image ) Attach the front first, then do the back. My back 6' piece was warped a little so I drilled a third hole between each of the two pairs of holes and I bored this one out more so that the screw would slip easily back and forth in the 6' piece allowing it to progressively pull each joint tight. When attaching the back side check your angles often with a square. You could also use wood glue at each joint but I wanted to have the option to easily disassemble it in the future. ( Hint : When lining up your joints do it on a hard surface, not carpet like I did. ) |
|
| 2 | Once your 2x6 frame is assembled place the 6'x4' sheet of MDF on top of it and make sure the frame squarely lines up with it. Drill pilot holes around the perimeter, 3/4" in and at the same points as where the 2x6's attach to each other. Also drill pilot holes 1'4" in from the front and back over the top of the 3'9" 2x6's. Attach with the 1½" 312 screws. ( for permanent installations run a bead of wood glue over the top of the 2x6's first ) | 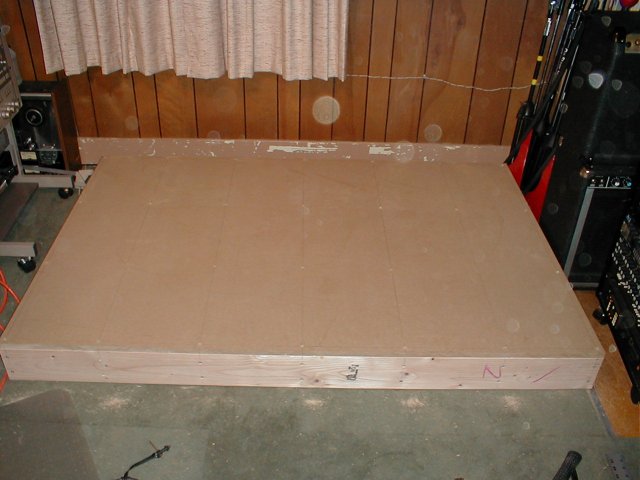 |
| 3 | Tip the floor up and attach the U-Boats. ( Warning! This Is A Heavy Floor! Make Sure That It Is Stable And Cannot Fall! Keep children, pets, valuables and your limbs out of the way! ) For the most part I spaced them about a foot apart ( per Auralex's recommendation ) but I could of probably used even less. Since the primary use for my platform is going to be playing a drumset I was concerned with having ample stability. The U-Boats will 'almost' stay on the beam where you put them but even if you manage to get the floor laid back down with out one or several falling off ( ever see the guy with the dinner plates on sticks at the circus? ;-) if you have to move the position of the floor in the future it's doubtful that the U-Boats will stay where you want them to. I simply used a small squirt of Auralex Foamtak Spray Adhesive on the beam where each U-Boat goes and it worked great. ( also a hot glue gun might also work ) At this time you could also insulate the the bottom of the stage with fiberglass or foam but I choose not to. | 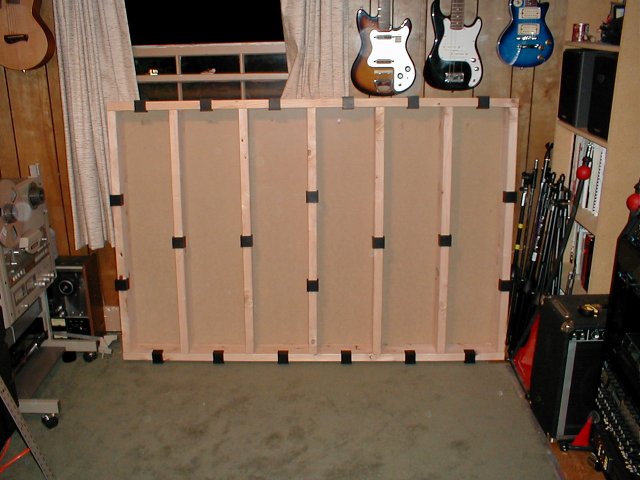 |
| 4 | Tip the floor back down and apply the next layer. Normally this would be 5/8" drywall but I used 1/4" Styrofoam insulation instead. Why? Well, mainly because I was getting really burnt out at the hardware store, tried to find the drywall but found this stuff instead and thought, this is easy, cheap, light and I'm outa here! In some ways I think it will be like double floating the floor and it may allow the top sheet of plywood to resonate a little in what I hope will be a beneficial fashion in my small dead room. If it doesn't work out I can easily switch it with a sheet of drywall. | 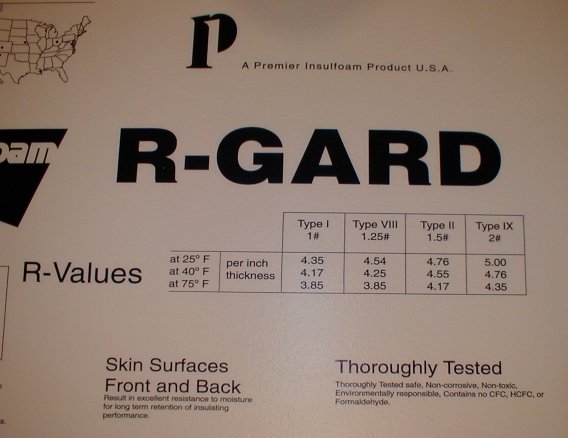 |
| 5 | I cut the R-Gard to just over 6' ( I planned to do the final trim once the top layer of plywood is on ) and used a little Foamtak to keep it in place while I worked on the next layer. The foam is double backed with one side reflective. ( I put the reflective side up for no other reason than it looked kinda cool for the few minutes it was exposed ;-) | 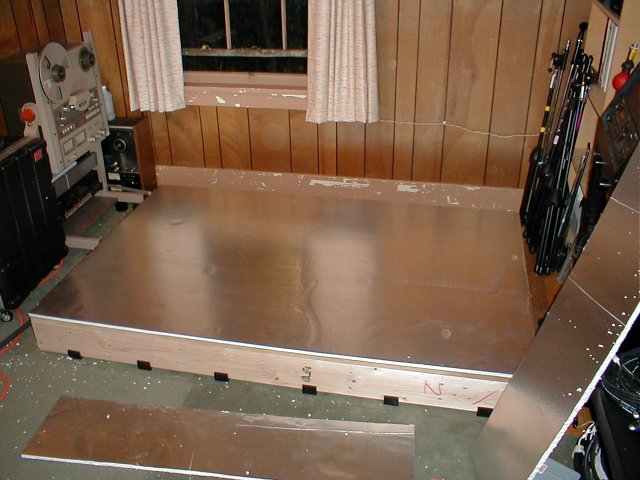 |
| 6 | Next put down the last layer which is 3/4" plywood. I attached it with 14 3½" #12 screws just around the perimeter of the stage. The oak plywood is beautiful stuff and part of me longs to finish it properly, but I don't want to do wood finishing work in my studio. I did quickly hit the edges with a random orbital sander, first with medium grit, then fine grit, to help keep it from splintering. | 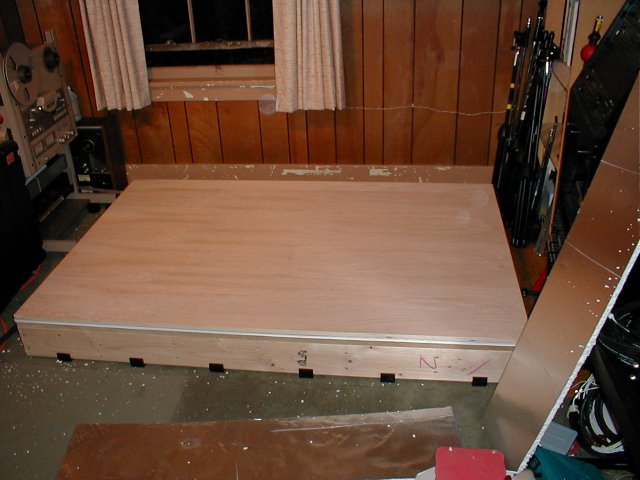 |
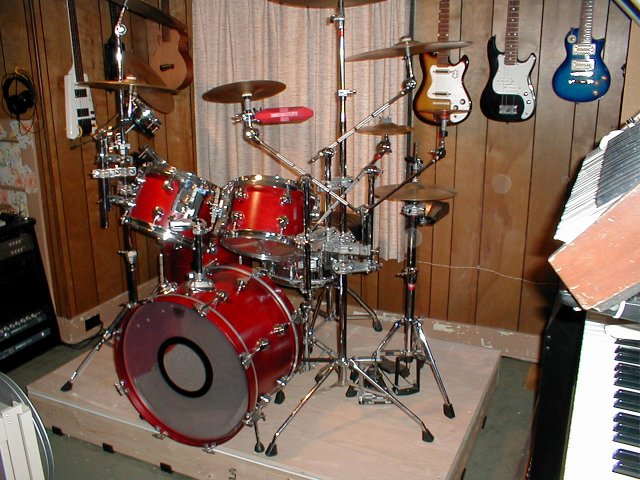
| 7 | Here are a couple pictures of the 'almost' completed stage. ( Notice how very close to the edge the drum stool leg is! ) |
|
| 8 | Since this stage is primarily for my use as a drum platform I decided to add some control to keep stands from shifting their positions. I found that clothes hanger pole supports for closets work really well. ( get the larger of the two sizes ) Also, you can barely see it in the back but since the stage was just a little shallow and my drum stool was almost falling off I decided to use the remaining two 3'9" 2x6's to extend the depth of the stage at the back. I screwed the first one to the back with 3½" #12 screws, centered and level with the stage, and then I attached the second one to the first in the same fashion. This gave me just enough room to be comfortable. |  |
| 9 | Once I had the stage done but before I put the drums on it I stood on the stage and clapped my hands, no, not because I was so pleased with my handy work but to check the sound. As you might guess since I was between two hard and parallel surfaces ( the stage and the ceiling ) there was a very nasty slapback echo. A diffusor might have worked well without deadening the sound but since I had some 1' squares of Auralex 2 Studiofoam I used some Foamtak and put 10 of them on the ceiling directly over the stage. It effectively killed the slapback. |  |